

If you're on Professional or Enterprise, you can set a schedule for your Zendesk by selecting a time zone, defining business hours, and setting up holidays.
If you don't provide 24/7 support to your customers, you can acknowledge your availability and give customers a better sense of when they can expect a personal response to their support requests. Even if you do provide 24/7 support, you can enhance your workflow by setting up views, triggers, automations, and reports based on your business hours set in your schedule.
Watch the video below to learn how schedules can impact customer experience and team reporting.

Setting a schedule for Zendesk Support
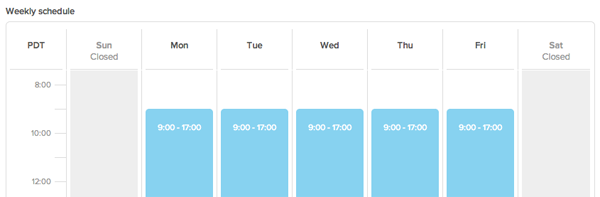
Your schedule includes a time zone and specific business hours each day in a weekly schedule for Zendesk Support.
You can also set up holidays as exceptions to the business hours set in your schedule. You can add as many holidays as you like, and they will be treated as outside of business hours and not count toward any metrics you measure in business hours.
After you set a schedule, you can create business rules based on the business hours in your schedule. You can also use business hours in reporting.
- Click the Admin icon (
 ) in the sidebar, then select Settings > Schedules.
Note: On Professional, you must enable business hours, if it's not already enabled. To do so, click the Off toggle to On beside Enable Business Hours
) in the sidebar, then select Settings > Schedules.
Note: On Professional, you must enable business hours, if it's not already enabled. To do so, click the Off toggle to On beside Enable Business Hours
- (Enterprise only) Click Add schedule and enter a Schedule name and select a Time zone, then click Save. Click the Work week when you finish the settings.

- Keep the preset business hours or modify the business hours and click Save.
- To move a block of time, drag the time block up or down on that day.
- To change the start or end time, drag the top or bottom of the time block.
- To remove hours from a day, click the X in the upper-right corner of the time block.
The day changes to Closed.
- To add hours to a closed day, click anywhere on the closed day.
A time block appears where you clicked.
The hours you set are relative to the time zone set for your Zendesk (unless you are on Enterprise, and you selected another time zone for your schedule). See Setting the time zone and format for Zendesk Support.
- Click Holidays, then click, Add holiday, if you want to set any holidays as exceptions to your scheduled business hours.
Note: You can schedule holidays up to two years in advance.
- Enter a Name for the holiday, then click in the first date field to pick a start date, and click in the second date field to pick an end date.
You can choose a single day (by picking the same start and end date) or a date range (by picking different start and end dates). You cannot set a partial day holiday.

- Click Save, then click Add holiday again to add multiple holidays to your schedule.
The holidays you add appear in your list of holidays in chronological order.
Simply click in the expanded holiday to collapse it. For information about managing your holidays, see Managing your holidays.

- (Enterprise only) Click the back arrow to return to the Schedules admin page, then click Add scheduleagain if you want to set multiple schedules.
 Note: If you set up multiple schedules, you must create triggers to apply your schedules to tickets (see Applying your schedules to tickets (Enterprise).
Now you can use business hours in business rules, reports, Talk, and Liquid markup.
For more information about business rules and reporting based on business hours, see Creating business rules based on business hours and Reporting based on business hours.For information on assigning Zendesk Support schedules to individual Talk numbers, see Using multiple schedules for Talk. Talk numbers with a Zendesk Support schedule will only route calls during Zendesk Support scheduled business hours.
Tip: If you added holidays, be sure to check out Liz Rosen's community tip, Holiday auto-responses made easy.
Deleting a schedule (Enterprise)
You can delete a schedule if you need to. When you do so, it's immediately removed from your account, and your Zendesk will use calendar hours, unless you have another schedule in place or add a schedule back to your account.
If you want to stop using business hours in your account, remove all schedules.
Managing your holidays
Your scheduled holidays appear in chronological order in your holidays list. You can click any holiday to expand it and show details or to collapse it and hide details.
Your upcoming holidays are shown by default, but you can filter by past holidays. You can edit, delete, or clone any upcoming holidays. You can clone any past holidays.
- Click the Admin icon () in the sidebar, then select Settings > Schedules.
- (Enterprise only) Click the name of a schedule on the Schedules admin page.
- Click the Holidays tab.
- Click to expand the holiday you want to edit.

- Make changes.
- Click Save.
- In the Holidays tab of your schedule, click the options menu beside the holiday you want to delete, then select Delete.

- Click Delete holiday to confirm the deletion.
The holiday is removed from your list of holidays.
- In the Holidays tab of your schedule, click the options menu beside the holiday you want to clone, then select Clone.
A new holiday with the same name appears in your list of holidays, expanded so you can edit it.
- Enter a new name and select new dates for the cloned holiday.
- Click Save.
- In the Holidays tab of your schedule, click Upcoming holidays, then select Past holidays.

Applying your schedules to tickets (Enterprise)
When you create multiple schedules for Zendesk Support, the first schedule that you create, and the one that appears first in your list of schedules, is always your default schedule. Your default schedule is used for all tickets, unless you set up a trigger to apply a specific schedule to specific tickets.
You need to create a trigger for each schedule you want to use for your tickets.
- Click the Admin icon () in the sidebar, then select Triggers.
- Select Add Trigger, then enter a title for your trigger.
- Add conditions for your trigger.
The conditions will determine which tickets get the schedule you set in the next step. For example, you might chose the condition ticket group is to set a schedule for a specific group. Or you might decide to set the schedule based on the ticket's brand or status. It's up to you.
- Add the action Ticket: Set schedule, then select one of your schedules from the drop-down list.

- Click Create Trigger.
If you need to find out which schedule is applied to a ticket, you can view that ticket's events (see Viewing a ticket's audit trail).
Creating business rules based on business hours and holidays
You can create views, SLA policies, triggers, and automations based on your business hours. You can create triggers based on holidays.
Any views, triggers, or automations based on business hours also take scheduled holidays into account, and consider them as outside of your business hours, unless you have set up a holidays trigger.
You can also use the Liquid placeholder for business hours in macros, triggers, and automations.
ticket.in_business_hours
Comments
0 comments
Please sign in to leave a comment.